WOW! YOU HAVE DONE A LOT OF WORK TO GET TO THIS POINT! YOU WILL NOW START TO PUT YOUR QUILT TOGETHER.
1. Arrange the star blocks, large and small filler squares and the filler strips as shown in the quilt assembly diagram. The “key” for interpreting the diagram follows.
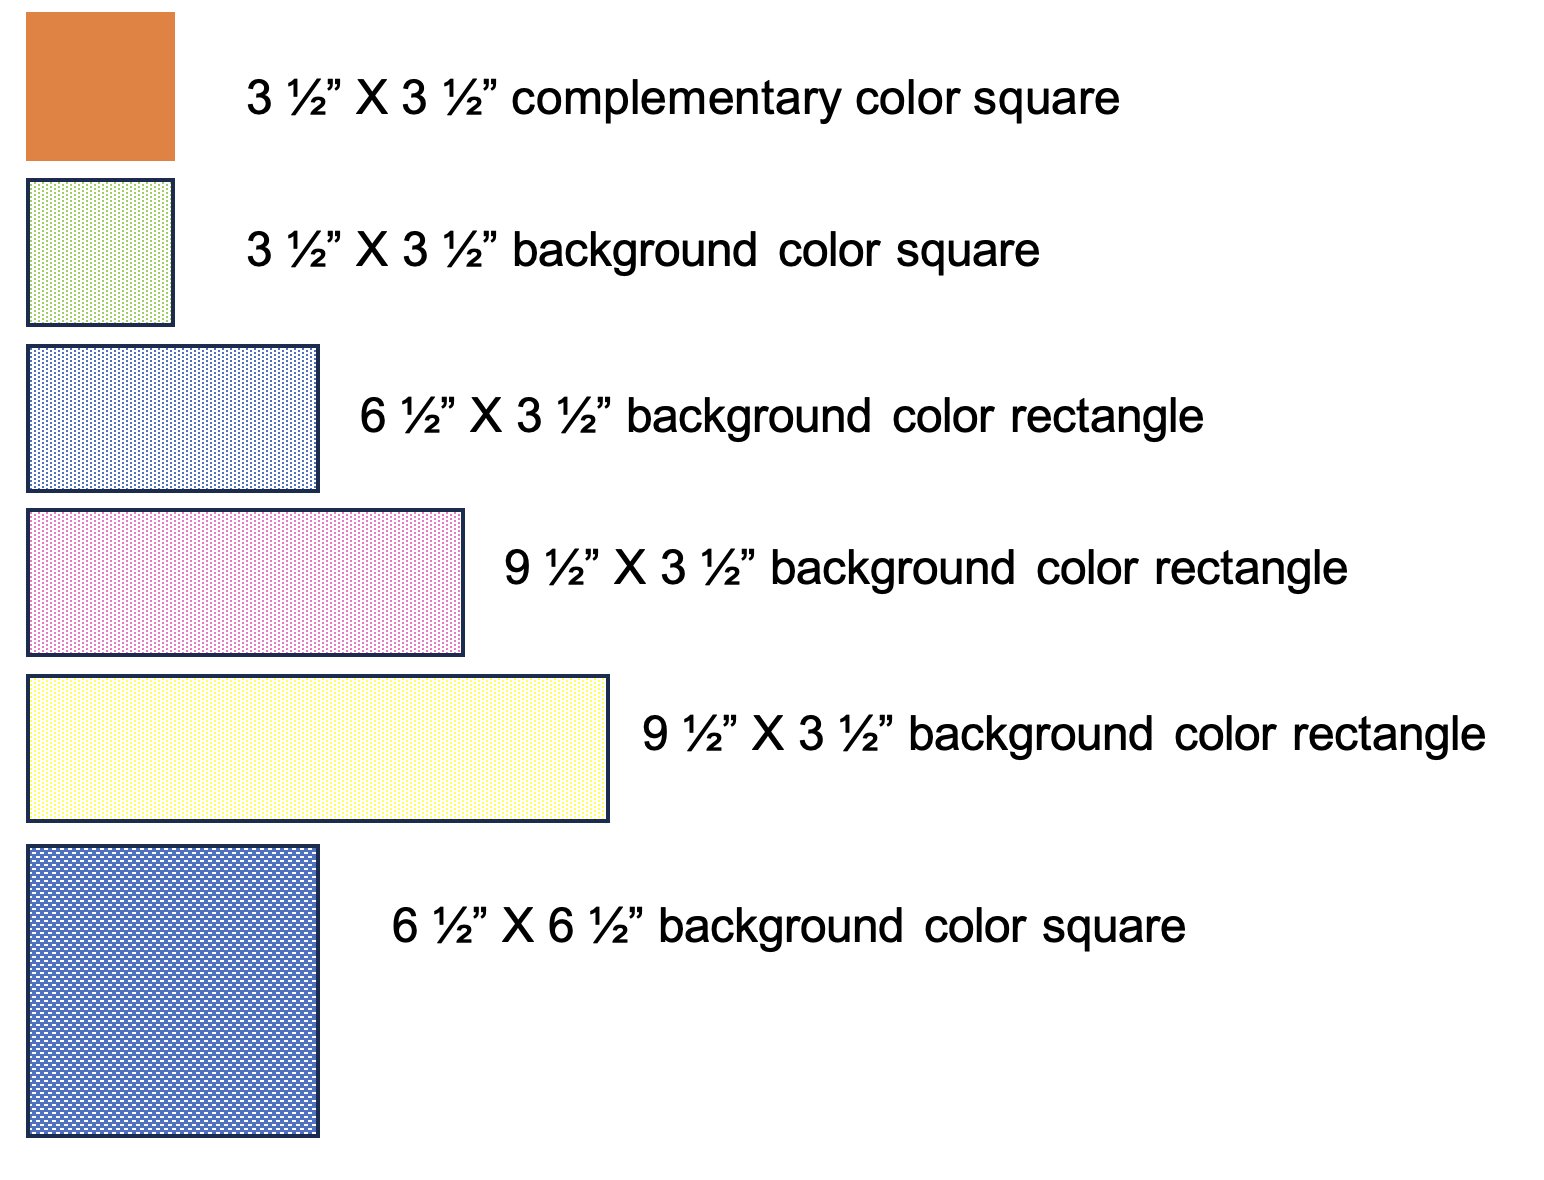
Quilt Assembly Diagram Key:
2. Sew the blocks, squares and strips together in “neighborhoods” as shown. Neighborhoods are groups of blocks. We recommend working on one neighborhood at a time.
![]() Each neighborhood has been assigned a number (shown in a white circle superimposed on the set of blocks) to simplify describing the construction process.
Each neighborhood has been assigned a number (shown in a white circle superimposed on the set of blocks) to simplify describing the construction process.![]() The black arrows show the first seams you should sew.
The black arrows show the first seams you should sew.
![]() The red arrows show seams that connect sub-neighborhoods
The red arrows show seams that connect sub-neighborhoods
![]() Neighborhoods 2 and 8 have three sub-neighborhoods. The angled fuchsia arrow in these shows the final seam to be sewn in that neighborhood.
Neighborhoods 2 and 8 have three sub-neighborhoods. The angled fuchsia arrow in these shows the final seam to be sewn in that neighborhood.
![]() In all cases, the arrows suggest the direction in which to press the seam.
In all cases, the arrows suggest the direction in which to press the seam.
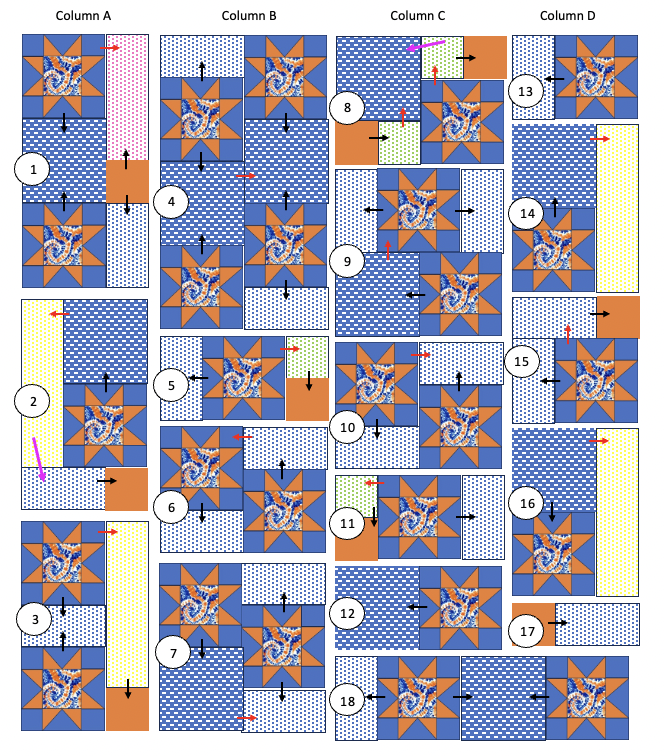
3.Sew the neighborhoods together into columns. To avoid wavy seams, it is best to join the neighborhoods in the following order:
1 to 2; then (1+2) to 3
4 to 5; 6 to 7; then (4+5) to (6+7)
8 to 9; 11 to 12; (8+9) to 10; then (8+9+10) to (11+12)
13 to 14; 16 to 17; (13+14) to 15; then (13+14+15) to (16+17)
Press so that seams fall in opposite directions whenever possible.
4. Sew columns together:
C to D, then sew neighborhood 18 to the bottom;
A to B;
then (A+B) to (C+D).
5. Sew the 3 ½” x 42 ½ outer border strips (background fabric) to the top and bottom of the quilt. Press the seams toward the border. Sew the 3 ½” x 54 ½” outer border strips (background fabric) to the sides of the quilt; press.
HELPFUL HINT: BE CAREFUL WITH YOUR STAR POINTS. YOU WANT TO USE THAT SCANT ¼” SEAM SO THAT YOU DON’T LOSE YOUR POINTS!
| Click <here> for a printable copy of the Quilt Assembly Instructions. |
